So I recently picked up a Xbox 360 off of eBay (got a really good deal on it for $25). Has a tiny bit of cosmetic damage, but it seems to run fine. The console didn’t come with any cables however, but I had a spare HDMI cable and controller lying around. What I didn’t have was a spare power brick though, nor a regular ATX power supply with appropriate output power.
The Xbox 360 I received is a late-model Jasper unit (last unit before the Slim models). Mine also seems to be one of the rarer ones with internal memory (512MB of it), which is pretty nice. There was save data from the previous owner on both storage devices though, so once I got the console up and running, I did a factory-reset on it (more on that in a little bit).

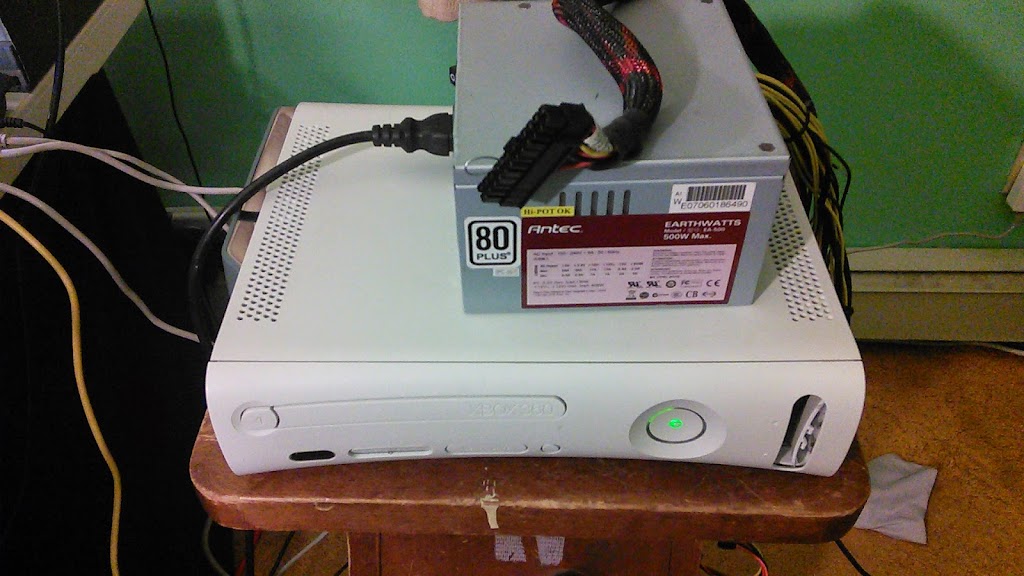
So, the Xbox 360 was in good looking condition, but having nothing to power it wasn’t really helpful. I started asking some people about whether they had a spare power brick, and even ran downtown to see if a few thrift stores happened to have any (unfortunately all the stores I checked were closed). Eventually a friend of mine finds a relatively decent ATX power supply that I could borrow, so I ran down his place to pick it up, along with a game. The power supply ended up being a Antec EarthWatts EA-500, and has more than enough power to run the Xbox 360 (the Jasper unit needs at least 150W, 12A on the 12V rail and 1A on 5V).
I then did a little bit more research into how to actually hook the PSU up, and found that it was actually relatively simple to just use the power from the Molex adapters (preferably more than one so load can be distributed). You could also use power from the CPU power connectors, or the 20+4 cable itself if you know what you’re doing.
I used two molex connectors from the PSU, and made sure that both connectors were on separate cables. Since this wasn’t my PSU, I couldn’t just splice the wire, so I cut some female molex adapters I had lying around and used those.
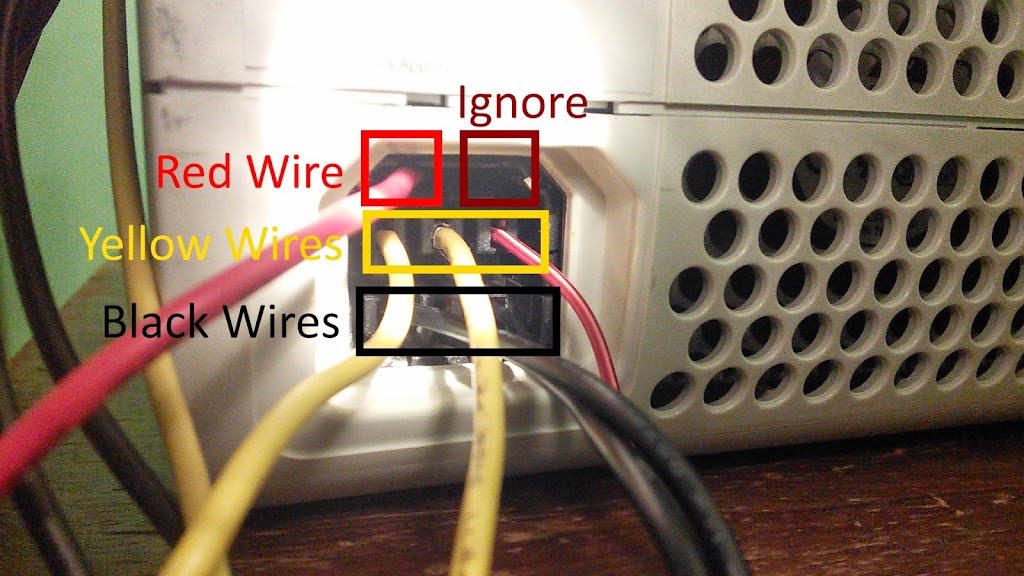
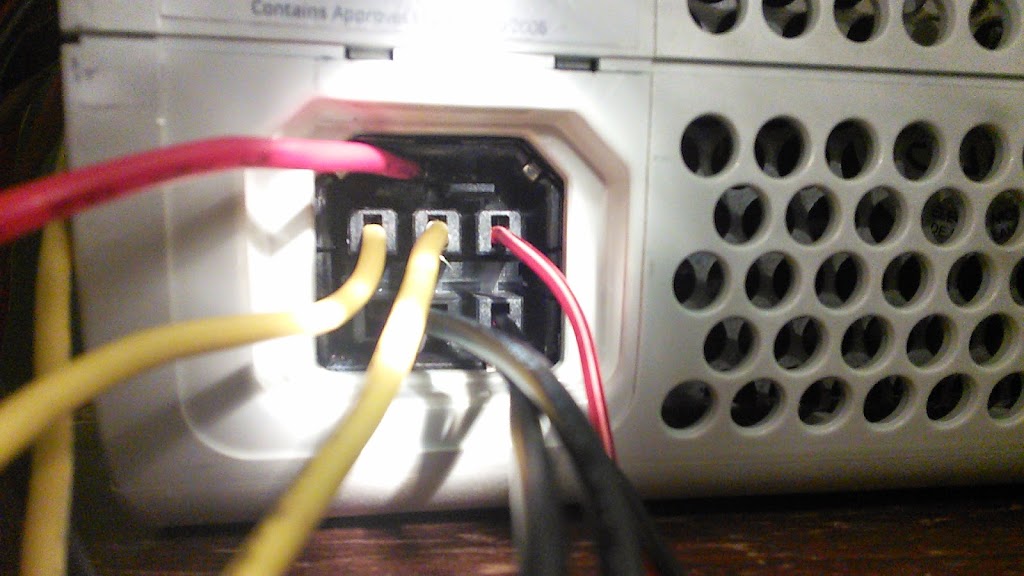
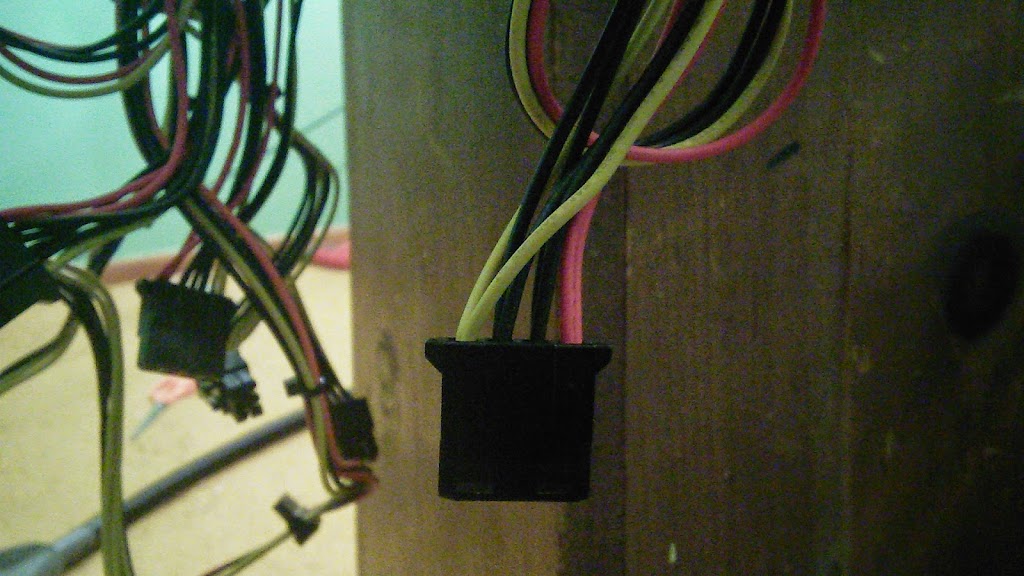
Inside the Xbox 360 power port, you have a bottom row of three holes. Above that is another row of three holes. And on the top, you have two pins (at least on Jasper; I think early models have a single bar). The general idea is to hook the black wires on the molex connector to the bottom three holes, the yellow wires to the three holes above, and a red wire to the left pin. The right-top pin is unused (I’m unsure what it does, but similar guides seem to ignore it as well). For the six holes, jamming a thick wire into the hole should be all that’s needed for a snug connection. For the pin at top, I had to fold the wire over once to make it a little bit thicker, then I just pushed it in the space.
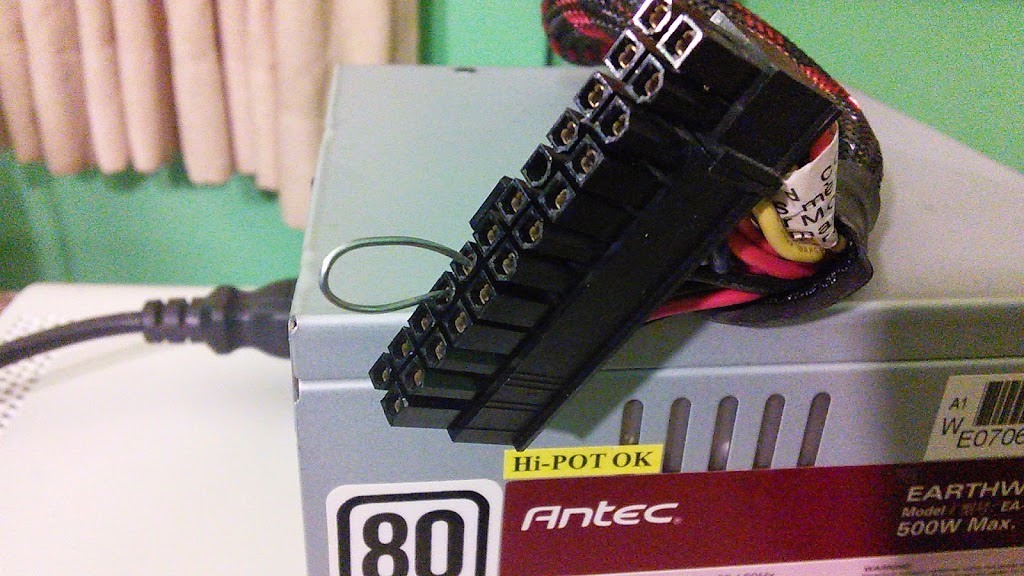
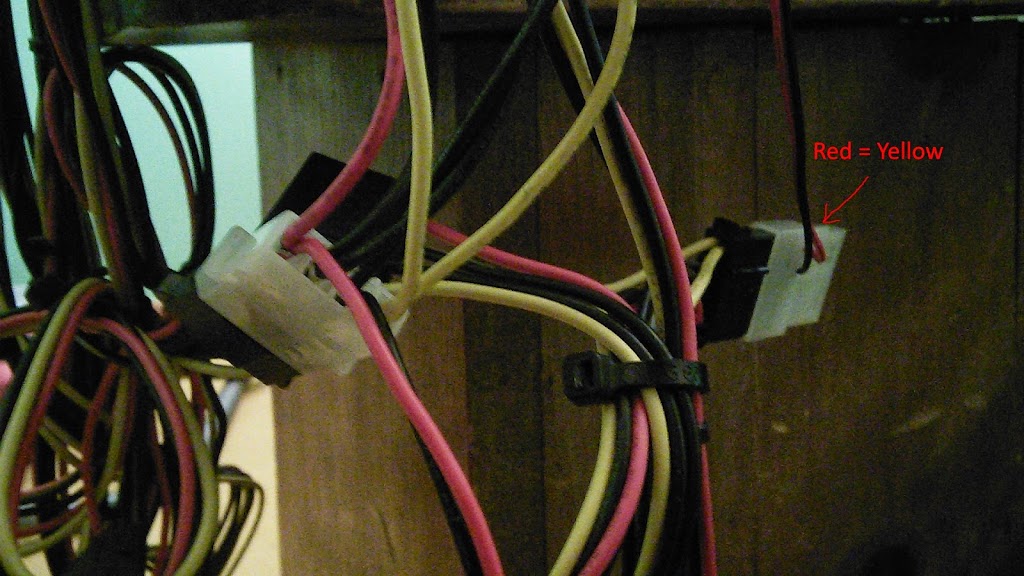
Since there isn’t an actual motherboard controlling the PSU on the 20+4 connector, you have to power it on via the pin short trick (aka the paper clip test method). It involves connecting the green wire to a nearby black wire.
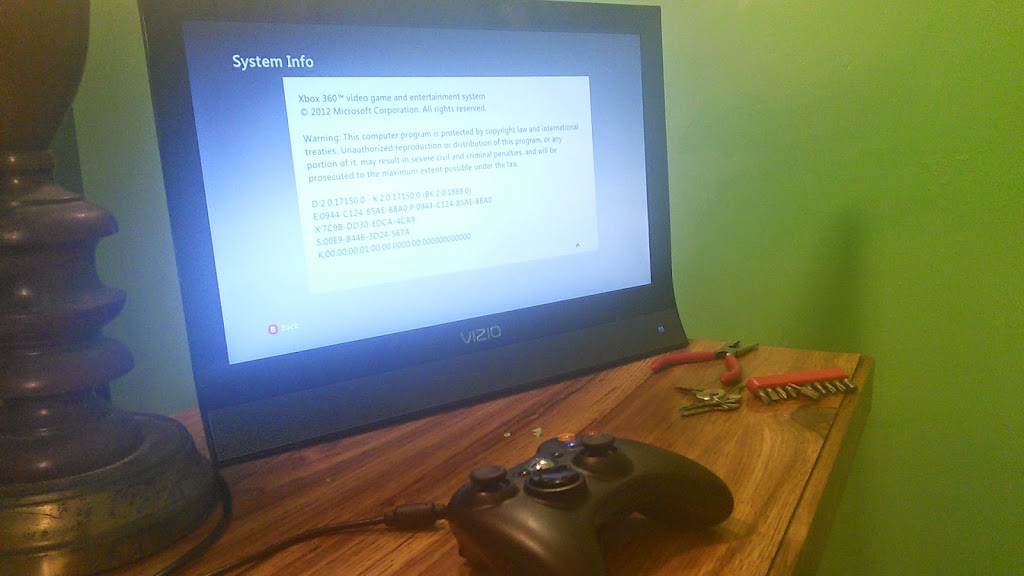
So once everything was securely hooked up, I turned on the PSU (switch on the back), and then pushed the power button on the Xbox itself. No explosions, pops, or smoke were seen, and the Xbox powered on. Played a little bit of some Need for Speed game just to make sure the PSU could handle load, and it did without issue.
Overall, this mod turned out great, and was a nice learning process. I’m unsure how it will hold up overtime, and the general consensus from others who’ve done the mod is that such a setup shouldn’t be ran long-term for some reason. I plan on ordering a power brick at some point in the near future though, so I likely won’t keep such a setup long-term either, but it is nice to know that this is easily possible.
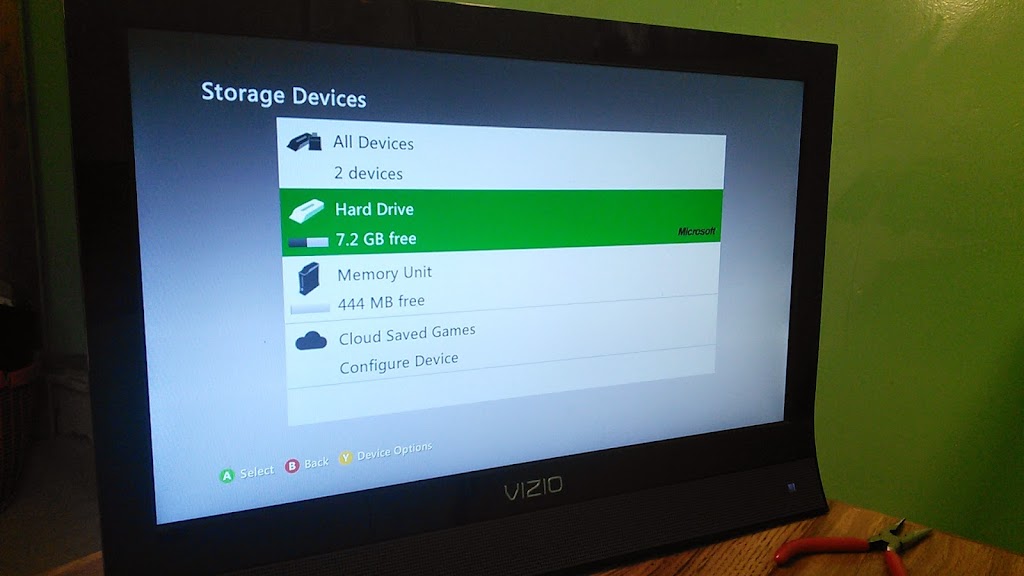
Now back to the factory-reset. After I verified the console works and I got it in an ideal location, I decided to try factory-resetting the Xbox, erase all content on the storage devices, and restore my profile onto it. Erasing the storage devices was simple enough. Factory-resetting however was a bit more difficult.
With a bit of searching, it seems you can factory-reset a Xbox 360 by pressing a ten-length button combination on the System Info screen. The catch is, it seems this button combination isn’t consistent between users and devices, so searching online for this combination is a gamble. May get lucky with the first combination you try, maybe the fifth, or maybe none at all.
The standard button combination begins with LT, RT, X, Y, LB, RB. The next four buttons after is what varies. I called up Xbox support and after verifying my account ownership and giving the representative my console’s serial number, I was provided with a button combination that worked (LT, RT, X, Y, LB, RB, Left, Left, Down, X; use the D-pad to enter arrow directions). I’m unsure what determines this button combination, or whether or not it changes over-time.
Once that was handled, I restored my gamer profile, and all was well after that. At some point, I plan on grabbing a copy of Warriors Orochi 3 and possibly Diablo III and playing them.
As for how I got the Xbox for $25, I decided to check eBay one day when I saw a friend selling his console, and wanted to get a general price on it. Was total luck that I saw the $25 listing, and was lucky I even got the order in for it (there was a quantity of 20 listed, I bought one, and then someone came by and bought the last seven). The seller claims he was trying to get rid of old stock to make-room for a new batch. This was the listing here.